前言
这边博客主要是总结一下最近看到iOS动画开发的一些基础知识。主要包含如下一些知识点。主要参考自《iOS开发实战:从入门到上架APPsotre》
1 | 1、使用UIImageView播放图片组动画 |
使用UIImageView播放图片组动画
使用UIImageview的animationImages属性将需要播放的图片加载进去,设置播放时长,和重复次数。
1 | - (void)viewDidLoad { |
代码运行后就会出现四张图无限轮播的动画效果。
UIView层动画的应用
一般的开发中,对于UIView层的动画是使用非常广泛的。iOS提供在UIView层上进行动画操作的类方法。
1 | /// NSTimeInterval:动画持续时间 |
1 | - (void)viewDidLoad { |
运行代码可以看到图从蓝色变为红色 位置偏移,大小变化,持续时间3秒,其他几种动画效果参考demo
UIView层过渡动画支持的属性
动画的执行还可以进行嵌套,可以将动画分成几个部分,执行完某一部分后在其回调中执行下一部分,下面列出一些动画过渡中可以支持的属性
1、frame:给视图的位置和尺寸实现过渡的动画效果。
2、bounds:给视图内部的坐标原点改变和尺寸变化增加过渡效果
3、center:为视图的
4、transform:给视图的几何变换增加过渡动画
5、alpha:给视图透明度增加过渡动画
6、backgroundColor:给视图背景色增加动画
7、contentStrech给UIImageview改变图片拉伸方式增加动画
bounds和frame.使用cgRect设置时,后两个参数决定大小,前两个参数中,frame决定当前视图在父视图中的位置,bounds决定子视图在自身中的坐标原点的位置
使用commit方式进行UIView动画创建
在iOS4之前使用传统的commit的方式创建UIView层的动画。这种方式包含四个步骤,1设置动画开始标志,2、设置动画属性,3、设置动画过渡效果,4、提交动画。
1 | - (void)viewDidLoad { |
对比上下两种动画,commit的方式更为传统,需要编写的代码也更多,因为是在iOS4之前,iOS4之后引入UIView的类方法的动画到现在应该是所有版本都适配的,现在基本没有iOS4以下的设备。而且commit创建动画的方式已经在iOS13以后被废弃了。所以还是尽量使用UIView类方法创建动画的方式更好。
UIView转场动画
相对于过渡动画,转场动画更多用于两个UIView视图的切换或者重绘某个视图。iOS中,UIView的转场动画有两种,一种是对UIView视图内容进行重新绘制,一种是使用新的视图替换旧视图的转场。
在实际开发中开发者会遇到这样的需求:一个UIView视图中有许多子视图,当用户数据变化时,子视图控件需要重新布局,使得原本视图看来变成新的视图。因为视图的重绘是在瞬间完成的,如果不添加任何转场效果,就会出现闪动,体验效果很差。
1 | - (void)viewDidLoad { |
切换视图的转场用于开发中整体视图的切换需求,这个操作会将原本的UIView从原本的父视图上移除,再将新的UIView视图添加到父视图上。其中option的定义是一个枚举,其中定义了许多转场的效果,可以进入源码查看其定义。
coreAnimation动画编程技术
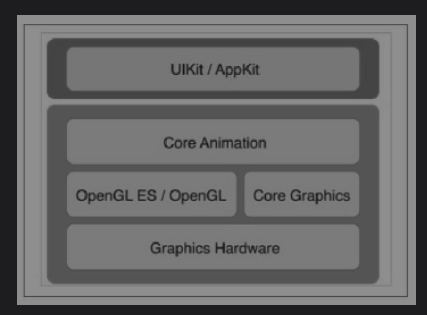
使用UIView层的过渡动画和转场动画可以满足绝大部分开发需求,但是也有许多局限性,使用CoreAnimation则可以更加自由的进行iOS动画编程。CoreAnimation是基于OpenGL和CoreGraphics图像处理框架的跨平台动画框架,下图给出了CoreAnimtion的系统结构图
CoreAnimation框架中大多数动画效果都是基于CALayer类实现的。每一个UIView都包含一个CALayer属性。边框,阴影等操作都是和CALayer相关的。
锚点,所有的CALayer对象都有一个anchorPoint属性,这是CALayer对象的锚点,可以理解为对象动作的参照点,其中x,y都取值在0~1中,CALayer对象锚点值默认为(0,0)是视图的左上角,如果要设置为视图中心,则将锚点设置为(0.5,0.5),当CALayer层执行操作时都是以锚点为参考点进行的。比如一些平移,旋转等。抛开Layer层,view层主要是处理事件接受和用户交互的功能。
色彩梯度层–CAGradientLayer
CAGradientLayer 是继承自CALayer的子类,是专门用来处理颜色梯度渐变的layer层
1 | - (void)viewDidLoad { |
上面代码中colors用于设置颜色梯度,bounds是设置CAlayer类的基础属性,用来设置layer层尺寸,position属性设置layer的位置,locations属性设置颜色梯度分界线,取值为0-1,startPoint,endPoint设置渲染的起始位置,此处为左上角到右下角,locations会渲染0.2部分红色,在渲染0.8部分的蓝色。
视图拷贝层–CARelicatorLayer
CARelicatorLayer可以理解为layer层的一个复制容器,起作用是复制一个已经存在的layer层对象进行复制渲染.
1 | ///CARelicatorLayer |
此处layer先创建一个layer层作为要复制的原本,作为子layer加到CARelicatorLayer对象中,CARelicatorLayer的instanceRedOffset设置每个复制副本背景色中红色的偏移量,对应还有蓝色,绿色和alpha的偏移量。instanceTransform属性用于设置复制视图的3D变化属性,上面的代码表示将每个复制的layer层沿着x轴正方向偏移100个单位。
图形渲染层–CAShapeLayer
CAShapeLayer是用于绘制图形的layer层,可以用来绘制一些自定义的图形。
1 | /// CAShapeLayer |
上面的代码中CGMutablePathRef创建了iOS中的绘图路径对象,CGPathCreateMutable()方法创建了可变的绘图路径对象,CGPathMoveToPoint()方法设置绘图路径起点,CGPathAddLineToPoint()为绘图路径增加一条线。fillColor可以设置图像的填充色。还可以设置线条颜色,线条宽度等内容。
文本绘制层–CATextLayer
CAtextLayer 用于进行视图上文本的绘制,UILable控件就是基于CATextLayer实现的。
1 | /// CATextLayer |
上面代码中设置了一段在layer上显示的文字。
CAAnimation动画体系介绍
通过前面的介绍,开发者可以通过CALayer设置许多视图UI上的属性,CAAnimation框架作用就是将这些属性的变化都以动画的形式展示出来,由于CALayer相对UIView可以更加灵活的设置更多属性,因此CALayer层的动画操作更自由。下图中是CAAnimation及其子类的继承关系结构图:
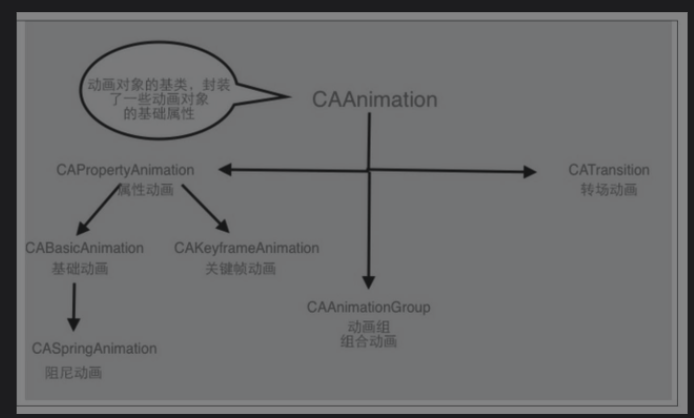
CAAnimation分出的三个子类CAPropertyAnimation,CAAnimationGroup,CATranstion分别用于处理三种不同类型的动画.CAPropertyAnimation可以处理视图属性改变的动画。CAAnimationGroup可以处理组合动画,CATranstion可以处理转场动画。CAPropertyAnimation分出两个子类,CABasicAnimation和CAKeyframeAnimation,这两个子类分别用来处理基础类动画和关键帧动画。基础动画的一个子类CASpringAnimation处理阻尼动画。
CAAnimation中定义了两个主要属性
1 | CAMediaTimingFunction *timingFunction; //动画执行时序方式 |
timingFunction中的动画效果是线性执行,淡入,淡出等,点击查看源码可以查看有哪些效果。
CAPropertyAnimation定义如下
1 |
|
CABasicAnimation创建基础动画
CABasicAnimation是动画框架中最常用的动画执行类,使用CABasicAnimation创建一个渐变色动画
1 | - (void)touchesBegan:(NSSet<UITouch *> *)touches withEvent:(UIEvent *)event { |
CAKeyFrameAnimation创建关键帧动画
通过关键帧创建的动画可以通过设置关键帧的方式自由控制整个动画的过程。
1 | - (void)viewDidLoad { |
运行之后可以看到视图在三秒内进行了位置偏移,切速度逐渐变快
CATranstion–layer层的转场动画
CATransition动画用来处理CAlayer层的转场效果,可以在CALayer对象出现时展示动画效果
1 | - (void)touchesBegan:(NSSet<UITouch *> *)touches withEvent:(UIEvent *)event { |
其中的type用来设置转场动画的类型,subType设置动画执行的方向。
layer层组合动画–CAAnimationGroup
CAAnimationGroup类没有定义特定的动画类型,可以理解为是一个动画容器,在其中加入组合后的动画效果,进行展示。
1 | - (void)touchesBegan:(NSSet<UITouch *> *)touches withEvent:(UIEvent *)event { |
上述代码给layer增加了三层动画,同时设置了旋转动画从第2秒才开始执行。
CATransform3D动画
任何CALayer对象都有transform属性,这个属性用来设置CALayer对象数学变换的效果。可以实现平移,旋转,放缩等动画效果。
1 | - (void)viewDidLoad { |
上面代码在同样位置创建了两个view,然后使用平移变换将其中一个进行了移动。trans2给图像增加了放缩变换,trans3给图像增加了z轴的旋转变换,CATransform3DInvert给将要增加的效果进行翻转。
效果如下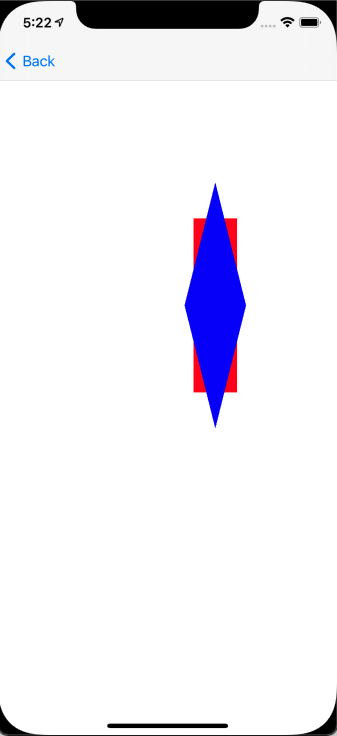
粒子动画效果
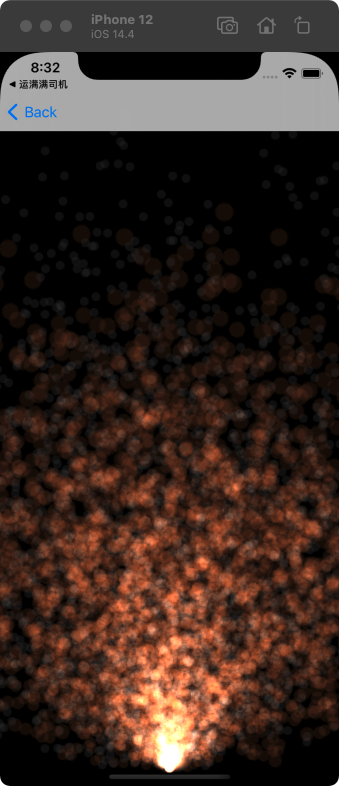
宏观上有序的,轨迹确定的规则动画可以从过layer层和UIViewAnimation实现,对于微观的,无序的,轨迹无法预测的随机动画,可以使用CAEmitterLayer实现。CAEmitterLayer可以实现效果炫酷的粒子动画,粒子效果分为两部分,一部分是粒子发射器,用于配制粒子的整体效果,另一部分是粒子单元,用于配制粒子的具体属性。CAEmitterLayer继承子CALayer。
1 | - (void)viewDidLoad { |
上述注释中解释了CAEmitterLayer和CAEmitterCell的部分属性,可以点击相关源码查看详细的定义。 最终的效果如下所示:
播放动态gif图
由于许多应用在进行某些需求的动画处理时会使用播放GIF图的方式,因此把这一技术也归纳为iOS动画开发技术。一般有两种方式进行GIF图的播放,一种是将其渲染为UIWebView进行播放,一种是将GIF文件中存储的图片数据与图片信息获取出来,使用UIImageView的帧动画进行播放。
使用UIWebView进行GIF图动态播放
GIF图渲染为UIWebView进行渲染具有简单,效能强的特点,缺点是加载GIF图需要一定的时间
1 | - (void)viewDidLoad { |
使用UIImageView帧动画播放gif图
gif图是一组包含图片及其信息数据的文件,其中记录着各张图片播放时长等信息
1 | /// 使用uiimageView播放gif图 |
最后效果和前面的WkWebView相同,展示了一个gif图。不过代码比较繁琐。从中也可以看出,如果要对gif图中的某一部分进行操作也是可以通过这种方式实现的。
以上代码demo请参考这里
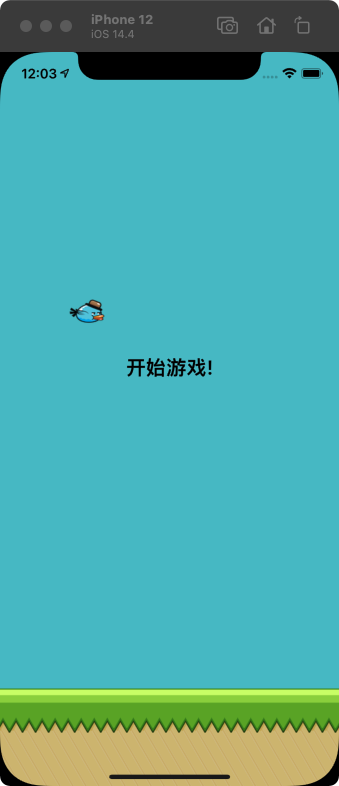
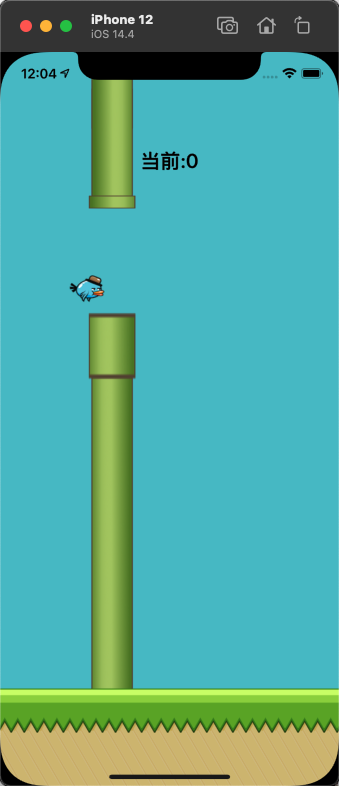
小游戏Flappy Bird设计
flppy bird小游戏是对iOS动画的一个小应用,也是参考书中的一个小demo,其中小鸟的动作通过动画实现。需要抓住的点是背景的移动是通过定时器实现的,在1/60秒内,屏幕上的背景会向左移动一个像素,从而实现了背景的移动。给小鸟所在的屏幕增加一个点击事件,每次点击小鸟的坐标都可以变化一定的像素。通过随机数设置障碍物的位置。下面是两张截图: 源码请参考这里